
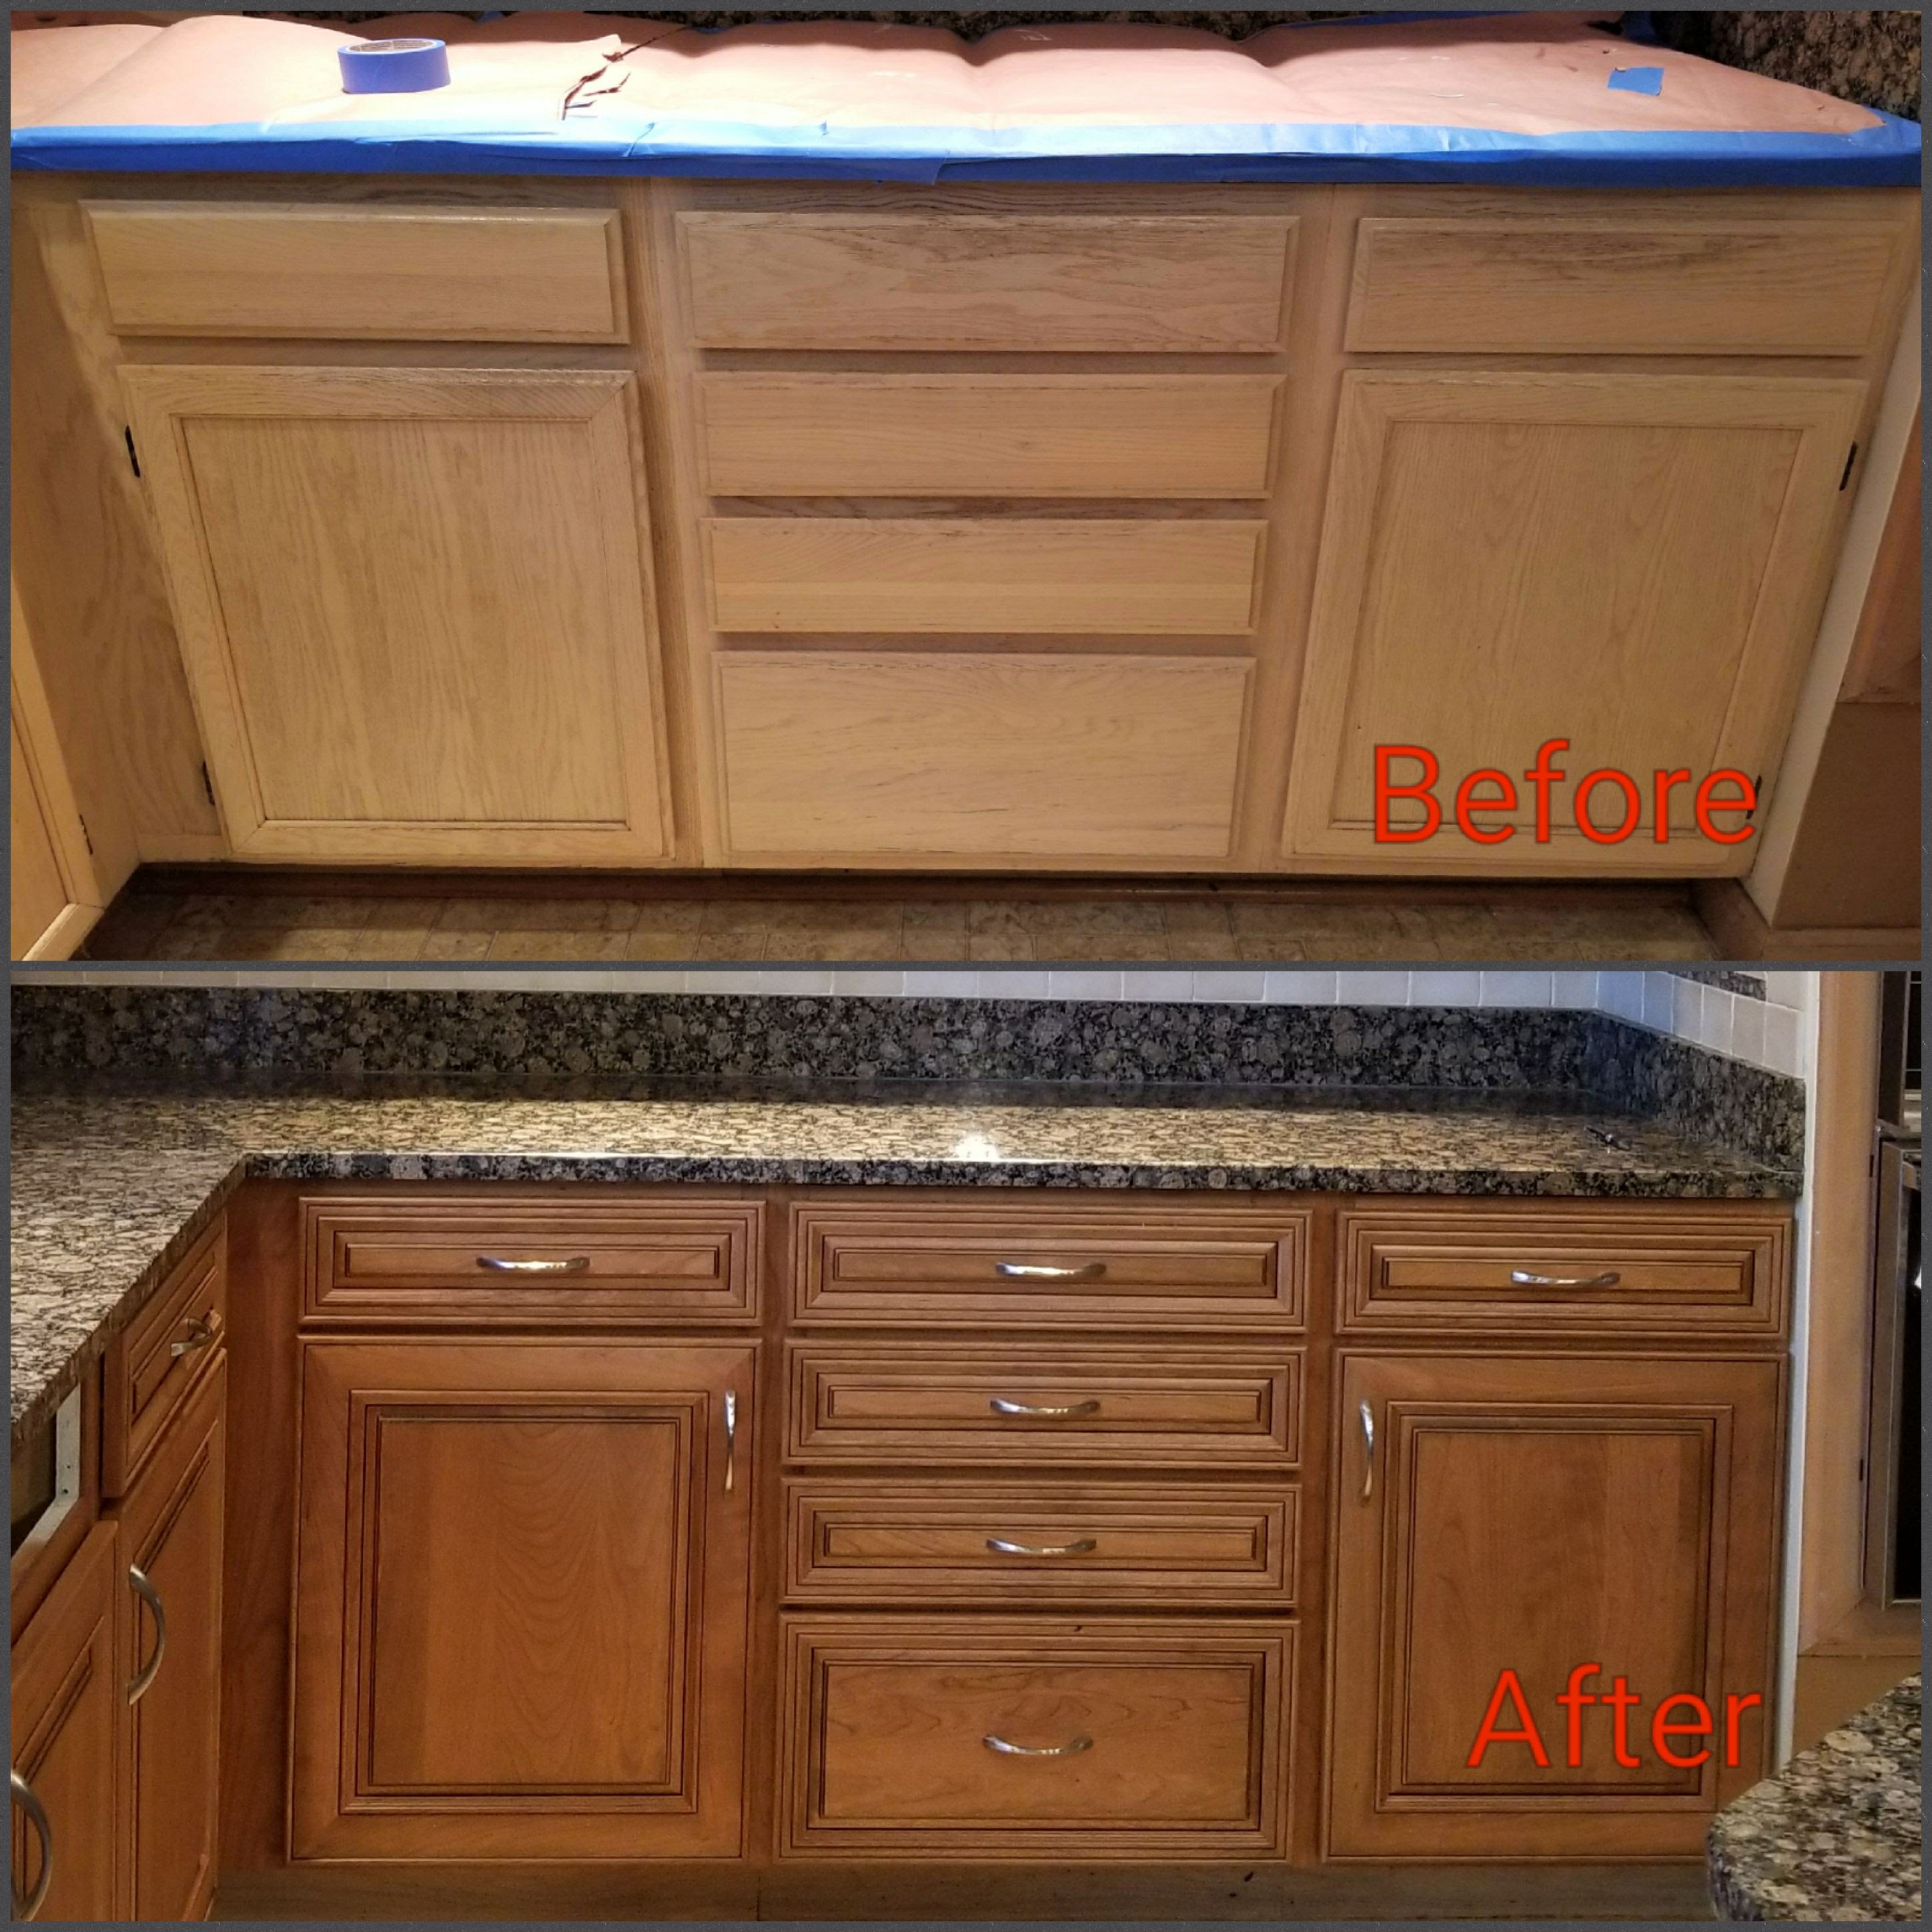
When it comes to changing the center of your living space, the kitchen needs particular focus. One of the most effective ways to revitalize this important part is via the process of refinishing kitchen cabinets. Such a process not only improves the appearance of your cabinets but can also dramatically enhance the entire aesthetic of your kitchen, making it inviting and fashionable.
By emphasizing crisp colors and modern finishes, refinishing the kitchen cabinetry allows you to alter the aesthetic of the culinary space without having to invest in the expense of a full renovation. Regardless if you like a modern and sleek atmosphere or a welcoming and earthy style, the possibilities are endless. Embracing the art of refinishing can make your ideas a reality while boosting practicality and aesthetic charm.
Choosing the Right Color Palette
Regarding kitchen cabinet refinishing, selecting the best color palette is important in realizing a modern style. Think about the overall concept of your kitchen and how the colors will blend with existing elements such as countertops, splashbacks, and flooring. A cohesive design can elevate the space, and colors should support each other while adding a sense of balance.
Neutral tones like off-whites, grays, and taupes continue to be popular options for cabinetry as they provide a everlasting backdrop. These colors can make the kitchen feel more spacious and more luminous, especially in smaller spaces. However, diamondsprayfinish.com shy away from vibrant colors like navy blues or emeralds if you're aiming to make a statement. These add personality and can create a dramatic focal point when used thoughtfully.
It's also crucial to think about the texture when updating your cabinets. Glossy finishes bounce back light and can create a modern atmosphere, while matte finishes offer a more sophisticated elegance. Mixing colors with different finishes can enhance dimension and style, allowing you to personalize the space to reflect your taste. Ultimately, your preferred palette should be an reflection of your character, making the kitchen a space you truly love.
Crucial Instruments and Materials
While initiating on a kitchen cabinet refinishing project, possessing the proper tools and materials is crucial for obtaining a professional look. Start with fundamental tools such as screwdrivers, a painting tool, and a application roller. These tools will help you to remove cabinet doors and apply your refinishing materials uniformly. Additionally, a block sander or an electric sander is necessary for get ready for the surfaces. Sanding not only takes away the old finish but also helps the new paint or stain bond better to the wood.
Then, you will need high-quality coatings or stains specifically designed for cabinetry. Choose products that are durable and easy to clean, as kitchen cabinets will withstand daily wear and tear. It’s also advisable to invest in a high-quality primer, especially if you are executing a significant color change, as this will enhance the final appearance. Don't overlook to have wood filler on hand for any dings or imperfections that may need repairing before refinishing.
Ultimately, protection and safety are crucial during the process. Make sure you have goggles, hand protection, and a mask to protect yourself from dust and fumes. Drop cloths or plastic covers will help you keep your workspace clean, stopping paint spills. By collecting these key tools and materials in advance, you will prepare for a better and more effective refinishing experience.
Guided Restoration Procedure
To initiate the refinishing process, start by taking off all cabinet doors and hardware. This allows it more convenient to reach all surfaces and guarantees a clean finish. Position the doors on a flat, ample work surface, and mark each door and its corresponding hardware to avoid errors during reinstallation. Wipe the surfaces thoroughly to remove grease and dirt, which could interfere with the adhesion of the new finish.
After that, it's time to sand the cabinets. Use a power sander for larger areas and manual sanding for corners and edges. Sanding works to remove the old finish and yields a rough surface for the new paint or stain to adhere. After sanding, dust all surfaces with a damp cloth to remove dust and particles. Some people opt for a primer, particularly if transitioning from a dark to a light color, as this boosts the new finish's vibrancy and durability.
In conclusion, apply the new finish of your preference, whether it be paint or stain. Use a high-quality brush or roller for uniform application, taking care to cover all corners and edges thoroughly. Based on the desired look, you may need a few coats. Be sure to allow adequate drying time between coats. Once the final coat is dry, reattach the hardware and put up the doors, ensuring everything is correctly positioned. Enjoy your renewed kitchen with vivid colors and finishes that update your cabinets.